Sony DCR TRV350 Versus the Sony DCR TRV351
What's the difference?
These 20 Preloaded MemoryMix Art Mattes were preloaded on the Memory Stick Pro which was included with the DSC TRV351 sold only as a package in Latin America.
Download trv350.zip [14.5MB],
over 200 more images from my hand!
or, for those without a .zip archive extractor,
Download trv350.exe [14.5MB], the self-extracting mattes archive.
The old page "trv351.html" is now renamed mattes.html
which has been RE-ORDERED.to reflect the new memory stick order
which places the most used mattes near the beginning.
Or Choose A LA CARTE from the menu below!
Or even learn to create your own!
The first 20 of these images were pre-loaded on the memory stick that accompanied the DCR-TRV351.
They were also downloadable from the ImageMixer software disk that accompanied both of Sony's TRV350 and TRV351 cameras.
I added the test patterns and the rest.
Download trv351.zip [560KB] which contain twenty of the images above (dsc00001 - dcs00020) and are described below.
You will need to unzip my interpretation of Sony's archive [560KB], then create a master folder on your computer's file system to unzip them into.
Alternatively you could copy the 640x480 pixel full size images onto your hard drive individually from the extensive collection in the catalog below:
Highlight the file name on the right side of the image and then copy that file name [CTRL-C] to the clipboard.
Click on the picture.
Some browsers ask if you want to open or save in an additional dialog box. Choose Save.
In the 'Save Image As...' dialog box
Paste the file name [CTRL-V] and
navigate to the proper archive folder on your hard disk.
Click "Save".
Once you have constructed and populated your computer's master file of mattes, you will need to transfer images to your memory stick, e:/dcim/101msdcf/dsc0XXXX.jpg
Like a Museum's collection — Two important things are occurring here, which unshackles our creative freedom, when we maintain an archive which is separate from the camera's memory stick collection on display.
Collection — Having a master copy in a known location allows multiple memory sticks to agree or disagree, create or delete images freely, without fear of loosing an important frame or overlay.
Field Organization — Skip unnecessary clutter - Retaining only the group of images important to a particular shoot helps speed the operator in the field to locate and load the right matte without having to scroll past hundreds of unneeded ones.
The camera-person could even group collections by media, having one memory-stick for decorative frames, one for "Magazine Covers", and another containing important watermarks, et cetera.
MS-Windows(95,98,98se,&ME) - You may need a custom USB driver before connecting your computer to your camera.
Windows Vista (NT), Linux and Mac don't need this special driver, but if you connect your
MS-Windows(95,98,98se,&ME) USB port to the camera without first obtaining and installing the correct driver,
MS-Windows(95,98,98se,&ME) automatically loads the wrong driver when it senses the Sony camera attached to the USB port, preventing proper communication between them, and you will then have to unload that driver and delete it from your
MS-Windows(95,98,98se,&ME) registry before you can load the correct USB driver and continue.
First I experimented with loading them into the camera.
BEFORE wiring up the USB ports, make sure you install the CORRECT USB driver software that drives your computer's USB port from the "Image Mix" CD-ROM disk included with your camera, or Sony's website first.
MS-Windows(95,98,98se,&ME) will automatically load the WRONG DRIVER if you connect the port to the camera first.
(This wasn't a problem with Linux. I connected, mounted the USB drive, and began to drag and drop.)
Once the driver software is properly installed, wire the camera up to your computer, then copying is simply drag and drop.
USB streaming is also possible from the camera mode and tape playback.
Alternatively, you don't even have to wait wire up your camera to the computer's USB port.
If you have a card reader, like many that are sold that connect to a USB port or even one on your printer, you can get started right away.
It helps to format the Memory Stick in the Sony camera first, snap a picture, and then move the memory stick to the card reader to load these mattes into the directory structure created by the camera.
Directories and file names are important. [e:/dcim/101msdcf/dsc0XXXX.jpg]
For convenience I use dcim/101msdcf to contain only the masks (mattes, frames an overlays) and protect user write property of each of the images to prevent them from being erased accidentally.
Then, using the camera's menu system with the memory stick installed and the mode switch flipped up to MEMORY, press the menu key behind the fold-out LCD display,
turn the thumbwheel down to MEM SET 1 and press the wheel in.
If you ADD a NEW FOLDER, that will automatically set the record folder to the new folder.
Select the REC FOLDER to 102MSDCF.
You can set a new record folder for each logical snapshot group.
I tend to snapshot sessions live in the even folders and then make another odd numbered folder when making snapshots from the session's tape playback.
This helps management by keeping the masks separate from folder pairs of organized photos.
I have also used the top level directory to store miscellaneous files without them interfering with photo and movie functions.
The images on the disk were dirty, an inconsistent field of dirty blue, so I cleaned them up for inclusion here.
That turned out to be a mistake.
The blue field seemed 'dirty' because when I used the thumbwheel to adjust the Memory Chroma Key, 1/4 of the bottom of the range resulted in undesirable spotty portions of the overlay being laid over the live camera image.
So I 'cleaned them up' with GIMP (Linux version of Photoshop) by replacing near blue with pure '#0000ff' blue.
So far, so good.
But the act of saving them introduced .jpg compression errors.
The camera was unable to recognize uncompressed complex .JPG images, but 85% compression seemed to work fine.
So I left the ones in the archive [trv351.zip 902KB] alone.
Once I learned what needs to be done to create a viable image, I then experimented with making new masks (see below.)
A la cart download:
To copy an individual matte from the collection in the catalog below:
Highlight the file name on the right side of the image and then copy that file name [CTRL-C] to the clipboard.
Click on the picture.
Some browsers ask if you want to open or save in an additional dialog box. Choose Save.
In the 'Save Image As...' dialog box
Paste the file name [CTRL-V] and
navigate to the proper archive folder on your hard disk.
Click "Save".
Or download the entire original and download my additional bonus creations, all with correct file names, in zip files.
There is a new order to the images. If you had previously downloaded my expansion trv350.exe back when it was on the trv351.html page (which has now been moved here and renamed mattes.html) you will notice that the images have been re-arranged. The factory mattes leading are no longer numbered from 01 through 20, now they are re-numbered 41 through 60. The shift is arranged to lead with the mattes most frequently needed in a hurry. Other mattes and backgrounds have been grouped by similar use such as 'binocular' with 'scope reticle' and other Keyhole frames as well as grouping picture frames among themselves, et cetera.
Download
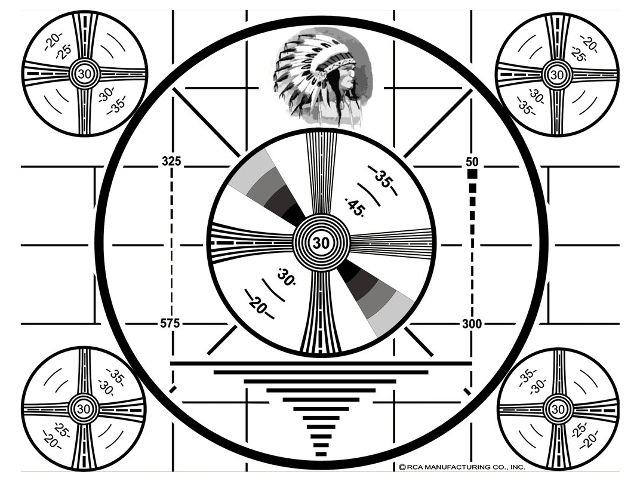
RCA TK-1C Monoscope Camera - Test Pattern Generator image.
Test Pattern:
Not officially included in the original Sony Memory Mix memorystick which was included in the TRV-351 latin package as well as on the accompianing CD-ROM of the rest of the TRV-350 series, but it seemed to be an appropriate image at an appropriate location, so I created this in the void of the zero position. Just because the origin is zero, does not necessitate it's emptiness.
Appropriated and adapted from Chuck Pharis, TV Historian ORIGINAL ART!
Purchase your own copy of the World's most famous TeleVision image, visit his site. Also see: dsc00012.jpg and dsc00013.jpg watermark mattes.
Camera Chroma Key.
(shoot subject on a blue background.)
comment Download
Now a watermark, this famous Indian image is from the original art used to create the Radio Corporation of America RCA TK-1C Monoscope Camera - Test Pattern Generator image. See dsc00000.jpg for source and details.
Memory Luminance Key.watermark
comment.
Download
Now a watermark, this famous Indian image is from the original art used to create the Radio Corporation of America RCA TK-1C Monoscope Camera - Test Pattern Generator image. See dsc00000.jpg for source and details.
Memory Chroma Key watermark
comment.
Download
More of "Not Really" - Imperial Walkers is actually container cranes against the sky, a snapshot from Digital8 tape replay.
I taped them near the Harbor without monitoring the viewfinder out of the window while rolling on a rough road.
Knowing in the back of my mind that the MemoryMix project was coming up, I had been keeping an eye out for shots that would make good overlays, such as picture frames in museums.
This one jumped out of otherwise junk footage because of an upcoming project (that hasn't happened) of taping gang members flashing gang signs.
I couldn't use the shots if the signs were on-screen, and this seemed a likely mask.
Memory Chroma Key.
comment.
Download
Some little hole in a wall.
Memory Chroma Key.
comment.
This is the Hole in the Floor of the "3D Museum", made famous by Future Film :
3D aperture
As seen on Thru the Mirror, narration transition sequence from live action to psychedelic 3D imagery.
Cutting room floor - proof of concept, camera test.
ORIGINAL SET the next 20 mattes, frames and backgrounds which were included on the DSC-TRV351 bonus memory stick were numbered by Sony as dsc00001.jpg thru dsc00020.jpg. I have shifted them up to 41-60 to accommodate and facilitate rapid access to frequently used mattes, frames and backgrounds.Download
A proscenium of curtains. Immortality quest? What drives folks to choose this one so frequently over the rest?
It's like the whole purpose of having a video camera in the first place.
To capture behavior, in this case overtly, as if on stage.
The desire to capture images behind this very mask is what compelled me to explore the whole memory stick project.
Theater Proscenium.
Memory Chroma Key.
comment.
Download
Alien landscape to dance on.
You will need a large blue cyclorama for this.
Camera Chroma Key.
(shoot subject on a blue background.)
comment.
^ ORIGINAL SET ^ of mattes, frames and backgrounds included on the DSC-TRV351 bonus memory stick. My extras follow&#hellips;Download
Wizard of Oz viewport, 16:9
Memory luma, frame.
comment.
Use this matte to make your own Wizard of Oz steampunk viewport like in the USA.gov public service announcement by the Los Angeles County Department of Consumer Affairs seen here on YouTube. Set Up: I switched NightShot on to tint the capture green, and shot thru a magnifying lamp with a fluorescent ring bulb to replicate the retro-future Brazil look.
Download
Wizard of Oz viewport, 16:9
Memory chroma, frame.
comment.
Use this matte to make your own Wizard of Oz steampunk viewport like in the USA.gov public service announcement by the Los Angeles County Department of Consumer Affairs seen here on YouTube. Set Up: I switched NightShot on to tint the capture green, and shot thru a magnifying lamp with a fluorescent ring bulb to replicate the retro-future Brazil look.
Download
Ski slope.
O.K. this one surprised me.
Use memory illumination on the white to replace with someones nose or belly.
Then use the Memory Chroma Key on the sky and matte their crotch in.
HILLarious.
It's mattes like these that remind me why I bought a TalkBoy and played Home Alone.
comment.
Download
Electric Neon frame.
You won't be able to see the edges when using this frame, just the little curls in two corners.
Memory Chroma Key.
comment.
Download
Another dual frame.
Use Memory Illumination to fill in the doilies frame with a static photo.
Then skip forward to that photo and use it to fill in the Memory Chroma Key blue with a live subject.
Memory Illumination and Memory Chroma Key.
comment.
Download
"What do you think about?"
An attempt to soften the blue edge.
Also a test of portrait aspect, tilt the camera left to capture your subject.
Then watch everyone tilt tilt their head right when they view it.
Memory Chroma Key.
comment.
Download
Go for it! Accidents will happen. Shoes frame.
Memory Chroma Key.
comment.
This was produced about the same time as "Forrest Gump" (1994) and perhaps the "G" shoe logo is meant to be "GUMP" shoes, or the "Go for it! Accidents will happen." is a reference to :) Shit Happens, when the film line is subtitled to Japaneese and translated back to English.
Download
More Shoes Portrait.
Camera Chroma Key.
comment.
This was produced about the same time as "Forrest Gump" (1994) and perhaps the "G" shoe logo is meant to be "GUMP" shoes, or the "Go for it! Accidents will happen." is a reference to :) Shit Happens, when the film line is subtitled to Japaneese and translated back to English.
Download
Color Test Pattern
Camera chroma, background
comment.
Identical to dsc00001.jpg This is a temporary place holder for the high definition Color Test Pattern Chart, which I haven't finished. Which is to say - It's done but not Reference Standard yet.
Download
"Santa Claus, give me a present"
Baby doll, game soft, a toy car, roller blade.
What the hell is game soft?
Japanese version of imperial American greed.
Camera Chroma Key.
comment.
Download
One of the virtues of being a Parisienne is that she knows how to make the best of things both in her home and in the adornment of herself. If she is poor, she hides her poverty without being ashamed of it.
Camera Chroma Key.
comment.
Download
Leaves on a froth of rainbows.
Memory Chroma Key views through trees and scales.
Memory Luminance results in similar scales.
And of course, Camera Chroma Key for background.
comment.
Download
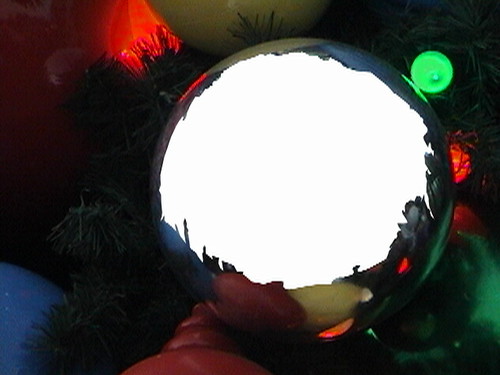
Christmas Tree Ornament, mirror globe
matte, memory luma, frame
comment.
Best when used with a fish-eye lens attachment.
This pair of frames was toned down to achieve the luminescent glow of the Christmas lights while allowing the Memory Luma function to matte the white as transparent. Download
Christmas Tree Ornament, mirror globe
matte, memory chroma, frame
comment.
Best when used with a fish-eye lens attachment.
This pair of frames was toned down to achieve the luminescent glow of the Christmas lights while allowing the Memory Luma function to matte the blue as transparent. Download
Christmas Tree Ornament, mirror globe
matte, memory luma, frame
comment.
Best when used with a fish-eye lens attachment.
This pair of frames was toned down to achieve the luminescent glow of the Christmas lights while allowing the Memory Luma function to matte the white as transparent. Download
Christmas Tree Ornament, mirror globe
matte, memory chroma, frame
comment.
Best when used with a fish-eye lens attachment.
This pair of frames was toned down to achieve the luminescent glow of the Christmas lights while allowing the Memory Luma function to matte the blue as transparent. Download
Christmas Tree Ornament, mirror globe, 3D Left
matte, memory luma, frame
comment.
Best when used with a fish-eye lens attachment.
This 3D pair of frames was toned down to achieve the luminescent glow of the Christmas lights while allowing the Memory Luma function to matte the white as transparent. Download
Christmas Tree Ornament, mirror globe, 3D Left
matte, memory chroma, frame
comment.
Best when used with a fish-eye lens attachment.
This 3D pair of frames was toned down to achieve the luminescent glow of the Christmas lights while allowing the Memory Luma function to matte the blue as transparent. Download
Christmas Tree Ornament, mirror globe, 3D Right
matte, memory luma, frame
comment.
Best when used with a fish-eye lens attachment.
This 3D pair of frames was toned down to achieve the luminescent glow of the Christmas lights while allowing the Memory Luma function to matte the white as transparent. Download
Christmas Tree Ornament, mirror globe, 3D Right
matte, memory chroma, frame
comment.
Best when used with a fish-eye lens attachment.
This 3D pair of frames was toned down to achieve the luminescent glow of the Christmas lights while allowing the Memory Luma function to matte the blue as transparent.
☟☋⍧⋪ɨ₦` μ↯⚣∱⍖ [Fuckin' MicroSoft]
Have you ever been rushing out of the office on a Friday afternoon and your desktop takes an extra hour to clear while the computer slows to a crawl, then prompts you to update the operating system and reboot? That is an extra four hours for me, unpaid, to babysit the restart while I stare at "Stage 3, do not turn off your computer!" bullshit. That's ☟☋⍧⋪ɨ₦` μ↯⚣∱⍖ [Fuckin' MicroSoft], cartoon speak for cursive expletives.
Memory Chroma Key
comment.
Download
☟☋⍧⋪ɨ₦` μ↯⚣∱⍖ [Fuckin' MicroSoft]
Have you ever been rushing out of the office on a Friday afternoon and your desktop takes an extra hour to clear while the computer slows to a crawl, then prompts you to update the operating system and reboot? That is an extra four hours for me, unpaid, to babysit the restart while I stare at "Stage 3, do not turn off your computer!" bullshit. That's ☟☋⍧⋪ɨ₦` μ↯⚣∱⍖ [Fuckin' MicroSoft], cartoon speak for cursive expletives.
Memory Luma Key
comment.
Download
View-Master, watermark logo
matte, field key=memory luma (brightness), logo key=memory chroma (blue), frame
The idea here is to fill in the logo "post-card style" with some exciting image such as a rollercoaster train. Then select that new image in memory-mix with the logo colorfully filled in to tape the action.
Load the memory mix and select memory chroma to replace the blue with your colorful, exciting filing. When you frame the tiny amount in the lower right corner in M.CHROMA, snap a photo.
You can quickly cycle up the image files and select the new image, and, with the thumbwheel, select M.LUMA, replacing the bright background with your subject. This is an example that works, but you don't have to use VIEW-MASTER. You can make these beforehand with your city, just like a postcard.
comment.
Download
View-Master, watermark logo
matte, field key=memory chroma (blue), logo key=memory luma (brightness), frame
The idea here is to fill in the logo "post-card style" with some exciting image such as a rollercoaster train. Then select that new image in memory-mix with the logo colorfully filled in to tape the action.
Load the memory mix and select memory chroma to replace the blue with your colorful, exciting filing. When you frame the tiny amount in the lower right corner in M.LUMA, snap a photo.
You can quickly cycle up the image files and select the new image, and, with the thumbwheel, select M.CHROMA, replacing the blue background with your subject. This is an example that works, but you don't have to use VIEW-MASTER. You can make these beforehand with your city, just like a postcard.
comment.
Download
Solid blue field Useful as a template to create new mattes. Also useful to convert a white wall background to chroma key blue when selected as memory luma key.
Memory Chroma Key blank template.
comment.
This last one has got to be the silliest, worst of the lot. I created it to be infinitely recursive down to the lower right corner.
640x480 pixel scales better at 5x5 image count.
So, of the original 20 matte images, I needed 5 more.
Since I needed something like this for the top of this page, why not recurs it into infinity?
So I included it in the collection.
Memory Chroma Key.
comment.
Here is how to go about making your own masks and mattes for the MemoryMix feature. But first, an explanation of the four different camera modes Memory Chrominance, Memory Luminance, Camera Chrominance and Memory Overlap and how the camera uses them to insert mattes into your video/photo stream. I created all of the images seen above, except for images dsc00001.jpg through dsc00020.jpg, which were included on the ImageMixer CD-ROM that accompanied the DCR-TRV350 camera and were designed to be foreground mattes or backgrounds in your production.
Sony's Website indicates that the only difference between the identical models DCR-TRV350 & DCR-TRV351 (which was only sold in Latin America,) was packaging which for convenience included a memory stick preloaded with the mattes also supplied on the CD-ROM.
M.CHROM
— Memory Chrominance mattes, frames, and overlays. Open Photoshop or GIMP or your favorite image manipulation program.
I find it most useful to first create a 640x480 pixel canvas of pure blue "#0000ff' like dsc00025.jpg as a background, then layer in imaging and text in clear layers above it.
This allows the paint bucket tool to change the background to white, or cut away to transparency entirely.
The camera will only recognize the image if it is 640 pixels wide and 480 pixels tall, with a pitch of 72 pixels per inch.
Some of the images above were scanned from other sizes and scaled to fit.
Then the mask/matte layer was created with an alpha channel and cut away to reveal the pure blue layer beneath.
While working the transparency, the artist can choose any color for the background to assist distinguishing layers.
Masks and frames like these are used in the camera with the M.CHROM, or Memory Chroma-Key feature.
M.LUMI
— Memory Luminance is easier to create an overlay in a snap, but less exact and less versatile.
Simply hand draw or print signage on white paper, then take a snapshot of the sign with the photo button, either on the top rear of the camera (just right of the viewfinder) or on the remote, top left "PHOTO" key (on RMT-814 remote, included).
One could even snapshot a logo into a corner of the frame to create an instant watermark on the fly.
I have done this with a business card, letterhead, even a paper hat from Krispy Kreme.
When you switch to the tape or memory mode, press memory mix on the panel behind the display.
Select the image you just photographed with the "Memory - +" keys to the left.
When image is displayed in the small Picture In Picture window,
use the thumbwheel to select M.LUMI from the four mix styles, then press it.
One can adjust the amount of image bleed with the thumbwheel during taping.
Additionally some image elements may bleed through. With this stereo pair.
I had to mute highlights on the ornaments and the lights to keep them from the selection of transparency. And I had to do it evenly to both images to avoid visual discrepancy.
C.CHROMA
—Camera Chrominance.
Have you got a large blue cyclorama, evenly lit?
No?
How about a perfectly white room and a grip of blue gel Klieg lamps?
No?
Eh, Would you believe, the sky?
Camera Chroma or C.CHROM replaces anything blue in the field of view with the image selected in the camera memory.
This has the appearance of the Nightly News weather report.
It puts your full color live action subject in front of a stationary image in memory. The matte can be a false background, the camera doesn't care if any of the matte is blue.
That's the opposite of M.CHROM which puts a stationary image in front of your subject and the live action only shows through where the matte is blue.
— Memory Overlap is a cross fade from the still memory image to live action.
Just about any image can be used for this, blue areas are not required for this special effect.
It's an effect which can be quickly set up.
Snap a shot of the sign of a roller coaster as you pass underneath then you can repeatedly fade in your friends waiting in line.
When creating your own masks and frames, keep in mind overscan. The camera LCD display, eyepiece or attached monitor will not display 30 pixels on each side nor the top or bottom 20 pixels of the captured image. It is easy to loose sight of frames with narrow borders, those which fit entirely within the "overscan" and do not exceed this boundary. Sure, the entire image is captured, and snapshots collect the entire 640x480 image, either live or from tape playback. Newer Hi-Def TVs may adjust to the full frame, but older sets will only show the "image field" area, so your border is lost to those viewers.
Here is some additional information about the creation and use of Sony Memory Mix Mattes and correct loading on a memory stick I wrote for
Digital Video Information Network, Memory Stick Mattes, page 7
Sony Memory Mix Mattes
A Hard-luck Adventure of Discovery
I've made plenty of Sony Memory Mix mattes, at first I just loaded them on the 1GB (one gigabyte) memory stick, no loading luck. Then I racked my brain and pulled my hair reading the manual, with no help there. But I did extrapolate that the only difference between a trv350 (ntsc) and a trv351(exclusively sold to South American market) was the inclusion of a memory stick preloaded with mattes for the trv351. The mattes were included on the software CD-ROM along with a program to load them. So I inserted and formatted a SanDisk Memory Stick PRO Duo 1GB MagicGate in the camera and connected the camera to the computer with a 6pin(large) to 4pin(small) USB cable, and loaded the files. That didn't work because I loaded them into the root directory, but I had the mattes now, and used them as examples for creating more.
Image Names the camera likes
and where it looks for them
I examined the file/file-structure on the memory stick after touching 'record' during playback or touching record in Memory mode (to create a 320x240, 6fps, "MOV000xx.MPG") - or snapping stills by pressing photo in any mode except live Camera/16:9 screen capture (to create a 640x480 "DSC000xx.JPG")[but you CAN screen capture 16:9 playback] by connecting the USB cable and placing the camera in Memory mode. Indeed the files were located as "*:\DCIM\101MSDCF\DSC00xxx.JPG" (where 'x's indicate numerical digits.) When I then placed the mattes in that folder and danced jubilantly as the camera accessed each type of matte - Memory Chroma (key blue from matte), Memory Luma (key bright from matte), Camera Chroma (key blue from lens/sensor) and Overlay (cross fade from matte to lens/sensor). Next I determined that 2GB memory sticks work fine, I didn't have larger to test 4GB or 8GB.
I at once decided to keep only mattes in "*:\DCIM\101MSDCF\" directory/folder to avoid confusion later and have since found that to have been a wize choice. It's cleaner to add a new record folder in the field when changing location/client. Then the next folder will be named 102MSDCF, 103MSDCF, et cetera, and in each new folder the first capture file name is reset to dsc00001.jpg. I snap twin cameras simultaneously for 3D with the infra-red remote, and occasionally one of the cameras will misfire, skewing the file numbers - adding a new record folder to both re-syncs that - and having matching file numbers line up in separate left and right folders on the computer screen is a huge assist in post-production time saving.
Creating Mattes
and saving as straight .jpg
Earlier in the thread Rob Unck mentioned "Memory stick mask to "trick" my system into capturing a letterbox or anamorphic image". Yes, and you could lay in transparent (keyed) or other color within the bars, for text such as web address, phone# to order now, or even legalese. I built two binocular masks, one for 4:3 and one for 16:9 and they both have a scale of pixels marked off in 5 and 10 increments along the lower right corner - the scale doesn't show in playback, it is apparently cropped visually in the overscan of the studio video monitor, and it is distorted by MPEG compression on my Digital 8 stream but there is enough fuzzy/off-color blobs to pick up a pixel width/height measurement from a screen capture in the camera. This thread also reminded me that long ago I had forgotten that I wanted to create a "scope reticle" matte/mask, so I did that in 4:3 as well as making one up anaphorically 'compressed' perfect circles for use in 16:9 capture, and both MUST BE 640x480 pixels! So below I include a specification range and a short "How to Build Mattes." But first let me explain this all holds true for the trv350 and this is a forum regarding the Sony VX2100 / PD170 / PDX10 Companion, but it seems that the previous posts in this thread indicate that these Memory Mix matte specifications and instruction are correct but may perhaps be a subset of the capabilities of other Sony cameras.
ONLY 640 by 480 pixels can be read, now earlier in the thread someone mentioned that using a hexadecimal file editor application they were able to trim out a section of jpeg header code. That seems to me the width/height portion of the header, but I am probably wrong. If it is I would assume the camera to grab only 640 by 480 of the matte.
I save Sony Memory Mix matte/overlay/underlay images onto the memory stick only in the "*:\DCIM\101MSDCF\" directory/folder for my sanity in the field but first I save them in the \MemoryMix\ folder on my computer, file by file identically (which is not mirrored or briefcased!) Replication/duplication between the memory stick contents and my computer are always carried out manually to avoid loosing the great amount of time creating mattes by accidentally changing one and then propagating that error/omission to all copies. So I treat the computer folder as the source/master. Editing/creation is done in the \MemoryMix\work\ folder and files are saved in native app format (for me that's Gimp's .xcf) to preserve layers for later adjustment if needed. I commonly capture in 3D with a matched pair of trv350's mounted together on a simple "flash bar" in 640x480 4:3 and another hand-held trv350 in anamorphic 640x480 16:9 as hand-held, every camera is loaded with the same mattes for convenience, and arranging the file structure this way keeps that easily done. The camera is case insensitive, meaning it doesn't care if the filename is all caps or all lower-case or mixed, so I code the name as lowercase if the source is me and let the camera to PC connection (idiotic PC can't keep the name lowercase after transfer) indicate that all caps DSC0xxxx.JPG. You can have a dsc00000.jpg and mine is the b/w Indian test pattern (which I adapted from the original RCA art, owned by TV historian Chuck Pharis,) but it's title display on-screen is just that. Other title displays show as FFF-0XXXX where FFF is the folder-number and 0XXXX is the file number. The camera does not recognize file names DSC10000.jpg or higher, and when snapping a still at DSC09999.JPG it rolls over, and resets to DSC00001.JPG adding a new folder automatically. In the viewfinder properly recognized files display in the lower right corner as FFF-0XXXX using a hypen separator, and images/mattes with problems display as FFF-0XXXX using an underscore separator. Entirely unreadable images are skipped. When memory mix mode is selected, and a properly recognized preview image is in the frame, a photo snapshot can be taken that includes the preview image.
Settings for Saving your Mattes
Quality (compression factor inverse) 85-100%
I work in sharp, pixel for pixel 100%, bitmaped style, 16Million colors (hex FFFFFF= 16,777,216 combinations = 16,777,214 colors + white(#FFFFFF all on) and black(#000000 all off) and blue mattes key best at #0000FF (0 red, 0 green, all blue) in Gimp, but have used photoshop for my first mattes. I want to work in sharp corners, hard on and off precision, later I can smooth by loading a copy and saving with a new filename and induce smoothing by reducing the quality and adjusting the smoothing. I save my templates at the larger file size at 100% quality, but the camera will read lower quality, and itself will save at 85% quality for sake of file size compression. Sharp matte edges tend to capture noise on the transition edge - the digital memory of the camera doesn't switch quickly enough to the live image and artifact of the chroma/luma key color bleed through to the capture.
Smoothing: 0
There is another problem with the black bars (650x488) mask mentioned in above, the interface edge is neither blue (#0000ff) or black (#000000), it is blue/gray (#2f34ff) and that leaves a capture through the matte with a blue edged capture. As mentioned above, the camera records at 85% compression, which is more than plenty, so I keep a sharp mask and let later processes introduce noise, er... blend the matte smooth for me.
Optimize: off or on
I'm not worried about space on my 2GB MagicGate ProDuo memory stick. So I leave it off for quality concerns, not wanting the Gimp save process to alter my matte image. Setting this to 'on' doesn't prevent the camera reading the image.
Progressive: OFF!
The camera needs a straight JPEG to be able to load it into the Memory Mix comparator. Turning on Progressive save is sure to kill any ability of the camera to read the matte, just as sure as 641x481 pixels does. Leave it off.
Restart Markers: 0?
I have had intermittent success/failure with restart markers, but the camera can always open a matte that has none. I haven't played with saving in a range, but I think some images with restart markers read and others don't is related to the Progressive setting. I just leave it off for reliability.
Force Baseline JPEG: on
I tend to listen to the Gimp say (Readable by all decoders) and think that's probably a good thing here.
save EXIF data: off
I seem to recall having set this 'ON' that it's o.k. when unmodified, such as when immediately using a snapshot as a mask/overlay. But the image has problems loading when EXIF data's been modified, even by Sony's very own GPS-CS1KA Global Positioning Unit Kit. I just leave it off for reliability.
Thumbnail: NO! [leave check-box blank]
The camera can't handle thumbnail attachment in the image file.
Subsampling: 2x1,1x1,1x1 or 1x1,1x1,1x1
Doesn't seem to affect read/load, but affects quality again. I generally choose 1x1 subsampling for a larger size and least compression.
Comments: [must be blank]
having comments attached to the image keeps it from being read/loaded.
I have a feeling that the JPEG compression header is affected and that is the basis for most read/load failures. Add your comments/properties/et cetera, after you get the image back from the camera.
======
Test 1 Baseline: snapshot of playback capture as provided by the camera
image settings from screen capture =
------
640x480 pixels
*:\DCIM\101MSDCF\DSC00xxx.JPG folder&filename
quality 0.85
smoothing 0.00
Restart markers: off
Optimize on
Progressive: off
Force baseline JPEG (Readable by all decoders): on
save EXIF data: off
Comments: [must be blank]

======
Test 2 - Image pixel dimensions
------
form factor: 640x480 only!
I have tried ranging the width from 600 to 700 pixels.
I have tried ranging the height from 450 to 500 pixels.
There is a black bar mask mentioned in this thread at 650x488, that'll never work for me.

======
Test 3 - Progressive
------
dsc00154.jpg
quality 1.0000
Restart markers: off
Optimize off
Progressive on - choice caused inability to load file in imager
Force baseline JPEG (Readable by all decoders): on
save EXIF data: off
Comments: [must be blank]

======
test 4 - Subsampling
------
dsc00154.jpg
quality 1.0000
Restart markers: off
Optimize off
Progressive off
Force baseline JPEG (Readable by all decoders): on
save EXIF data: off
Subsampling:1x1,1x1,1x1 (changing subsampling from 2x1,1x1,1x1 seems to not affect reading the file or loading it for matte use.)
Comments: [must be blank]
I have a website [which you are currently viewing] for the trv350 Sony Memory Mix mattes at Sony DCR-TRV350 Digital Handycam / DCR-TRV351 extra images! where you can download the b/w Test pattern Indian, color test pattern bar, black letterbox bars, binoculars matte, and a variety of frames and backgrounds. But the most up to date collection, to which you are welcome to discuss and to add your own creations is the flickr.com group at
www.flickr.com/groups/trv350
Flickr: Memory Mix, insert Sony DSC TRV350 images!
![Load these on YOUR Camera! Download trv351.zip [560KB]](http://farm4.staticflickr.com/3595/3363644740_4ff518b226.jpg)
 dsc00000.jpg
 dsc00001.jpg
 Mike Novak is wearing a color correction tshirt, Redondo Beach, Pacific Coast Highway @ 190th St. southbound aboard MTA coach, Route 232, 2008.08.01 10:43 by Dr. Disney Wizard, on Flickr
3D aperture
As seen on Thru the Mirror, Terminal frame.
Mike Novak is wearing a color correction tshirt, Redondo Beach, Pacific Coast Highway @ 190th St. southbound aboard MTA coach, Route 232, 2008.08.01 10:43 by Dr. Disney Wizard, on Flickr
3D aperture
As seen on Thru the Mirror, Terminal frame. dsc00002.jpg
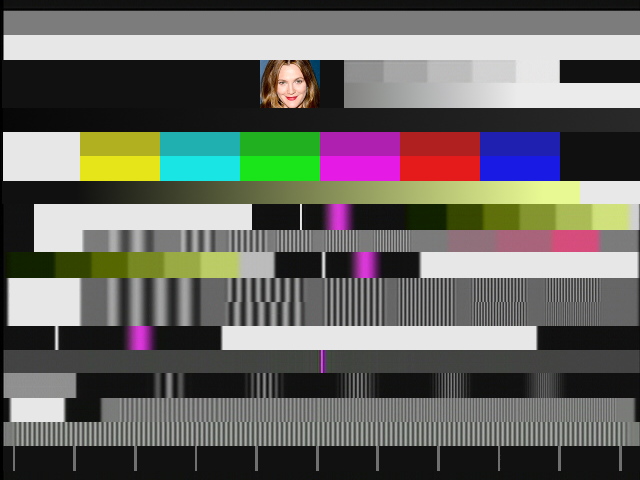 dsc00003.jpg
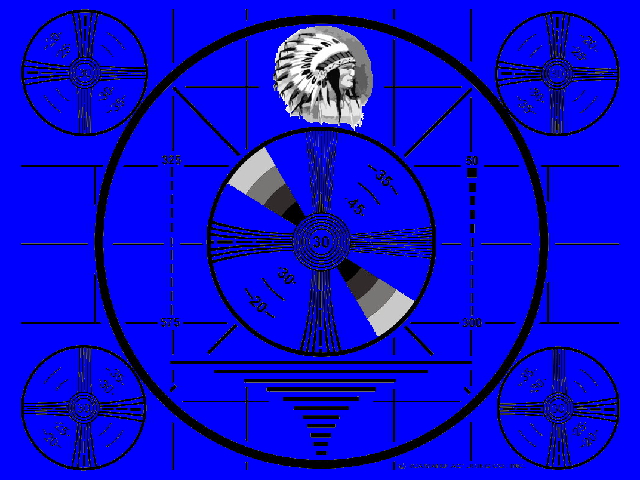 dsc00004.jpg
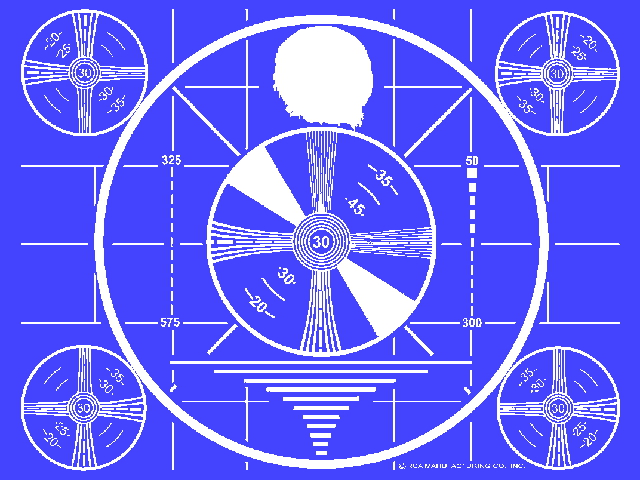 dsc00005.jpg
 dsc00006.jpg
 dsc00007.jpg
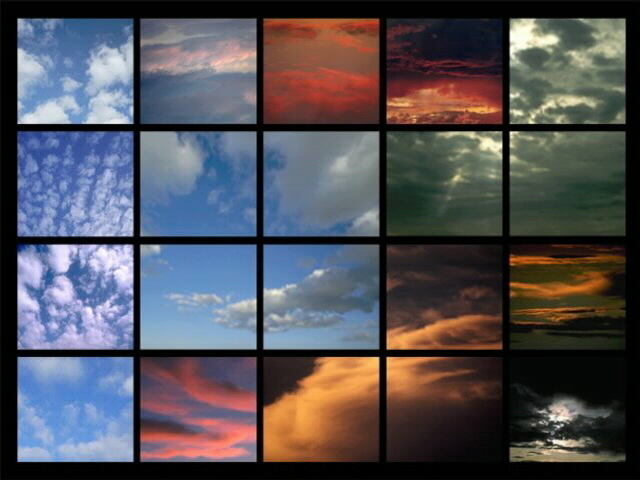 dsc00008.jpg
 dsc00010.jpg
 dsc00011.jpg
 dsc00012.jpg
 dsc00013.jpg
 dsc00014.jpg
 dsc00015.jpg
 dsc00016.jpg
 dsc00017.jpg
 dsc00018.jpg
 dsc00019.jpg
 dsc00020.jpg
 dsc00021.jpg
 dsc00022.jpg
 dsc00023.jpg
 dsc00024.jpg
 dsc00025.jpg
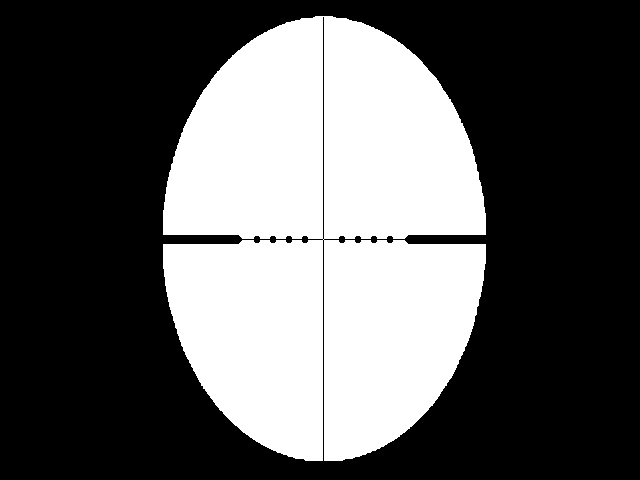 dsc00026.jpg
 dsc00027.jpg
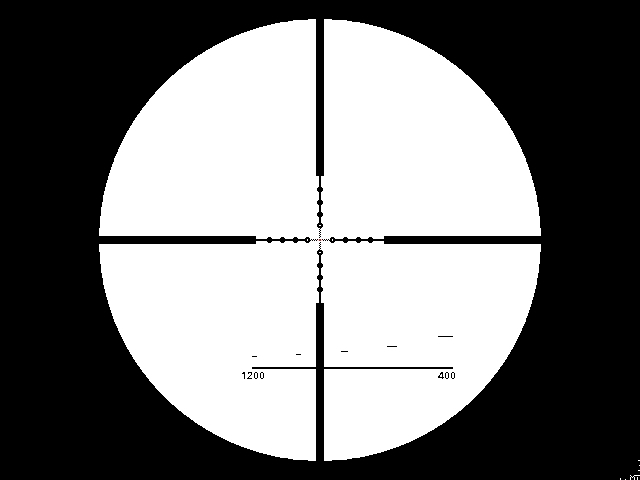 dsc00028.jpg
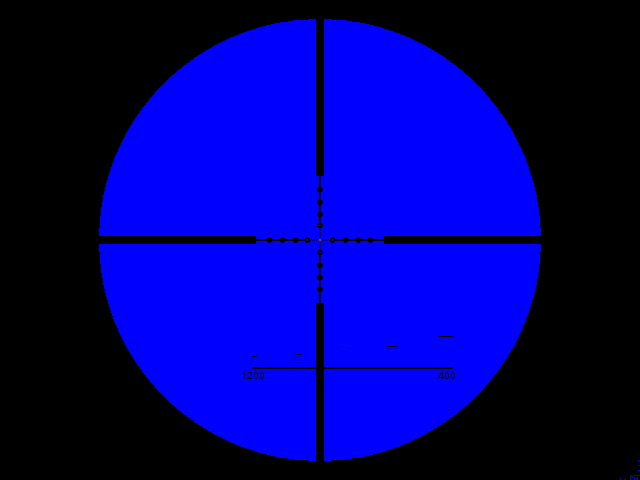 dsc00029.jpg
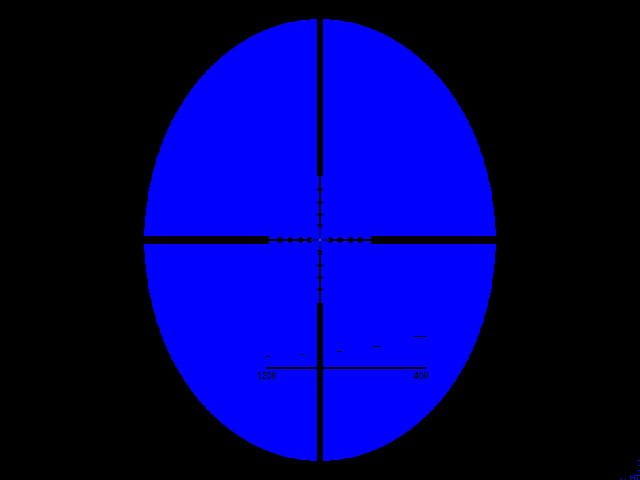 dsc00031.jpg
 Download dsc00034.jpg
 dsc00035.jpg
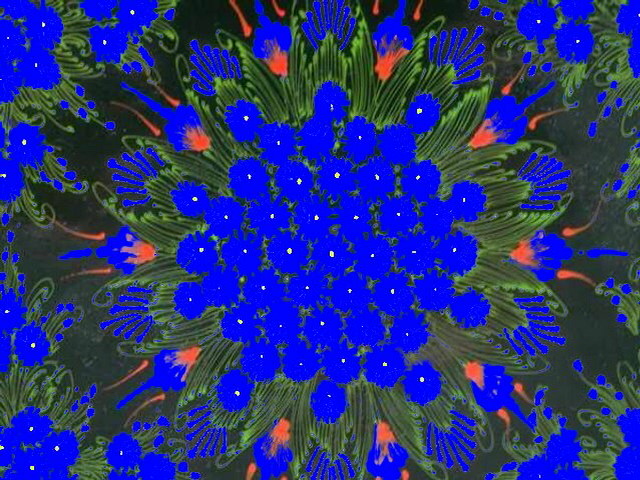 dsc00038.jpg
 dsc00039.jpg
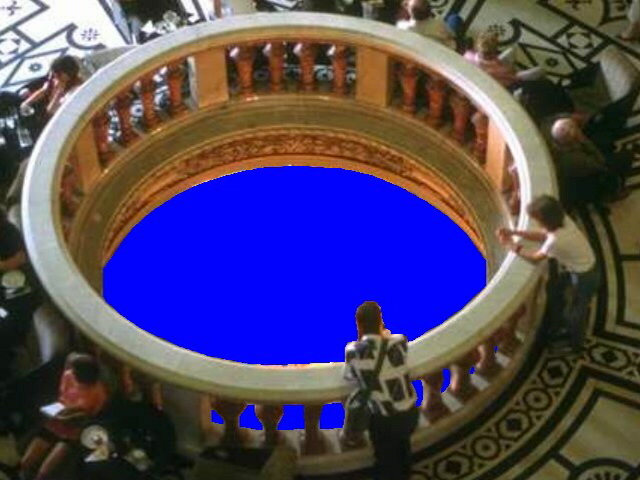 dsc00040.jpg
 dsc00041.jpg
 dsc00042.jpg
 dsc00043.jpg
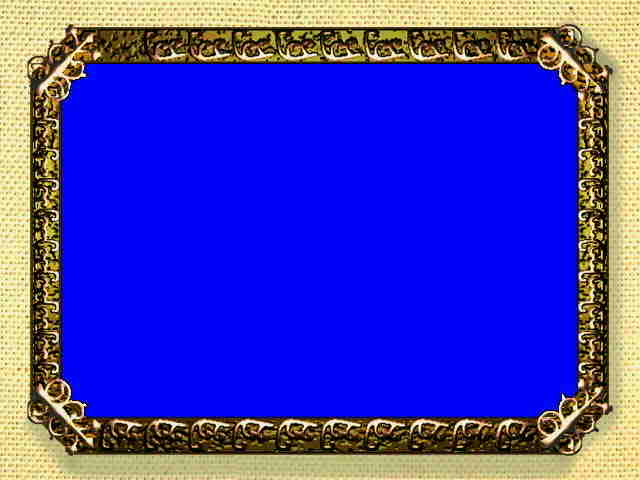 dsc00044.jpg
 dsc00045.jpg
 dsc00046.jpg
 dsc00047.jpg
 dsc00048.jpg
 dsc00049.jpg
 dsc00050.jpg
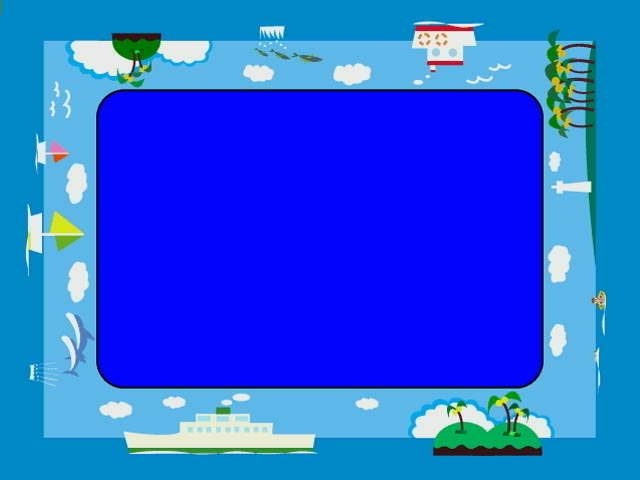 dsc00051.jpg
 dsc00052.jpg
 dsc00053.jpg
 dsc00054.jpg
 dsc00055.jpg
 dsc00056.jpg
 dsc00057.jpg
 dsc00058.jpg
 dsc00059.jpg
 dsc00060.jpg
 dsc00061.jpg
 dsc00062.jpg
 dsc00063.jpg
 dsc00064.jpg
 dsc00065.jpg
 dsc00066.jpg
 dsc00067.jpg
 dsc00068.jpg
 dsc00069.jpg
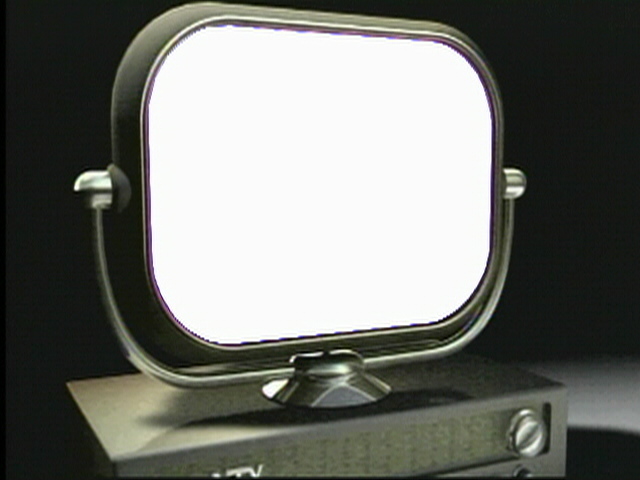 dsc00070.jpg
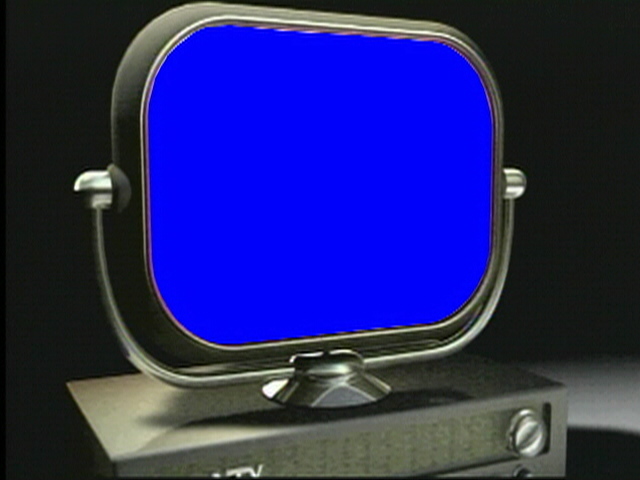 dsc00071.jpg
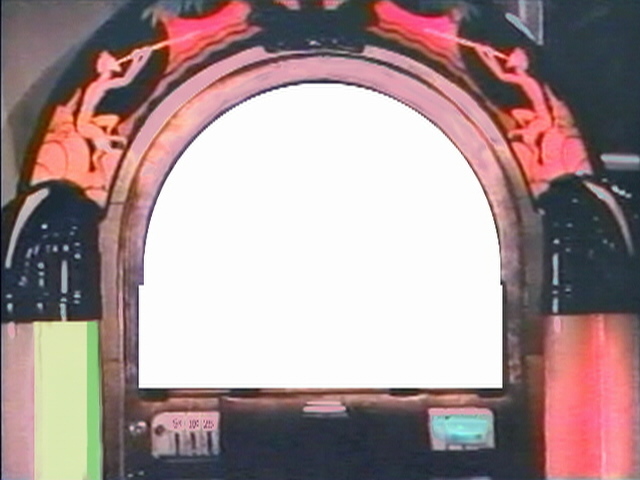 dsc00072.jpg
 dsc00073.jpg
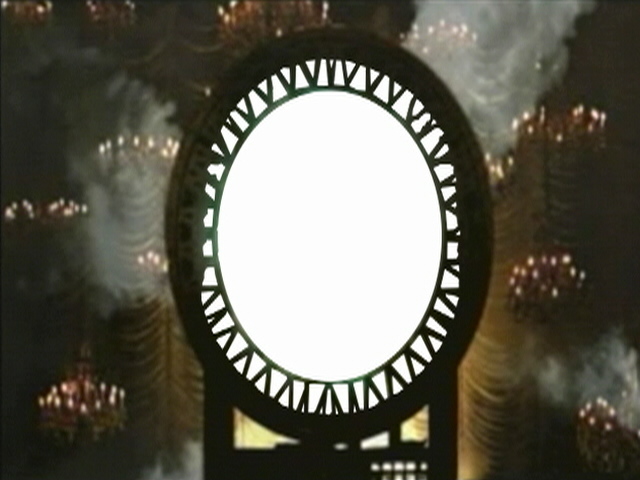 dsc00074.jpg
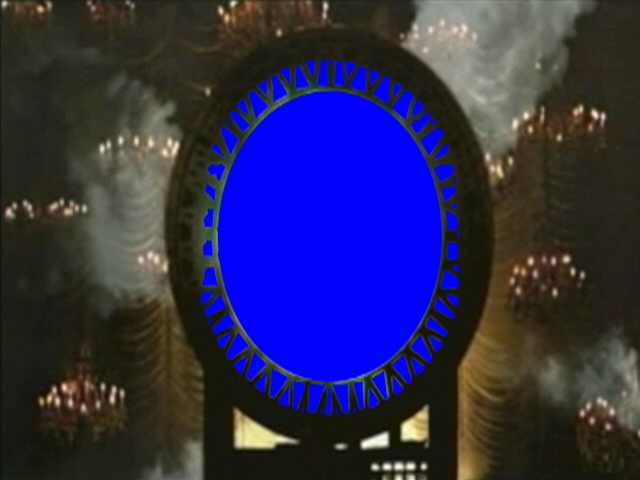 dsc00075.jpg
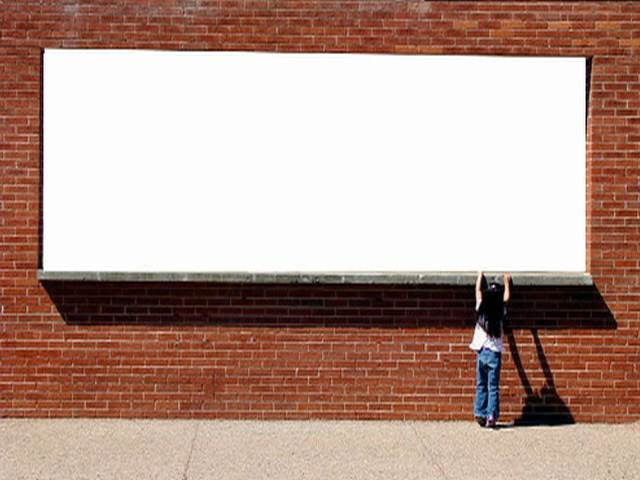 dsc00076.jpg
 dsc00077.jpg
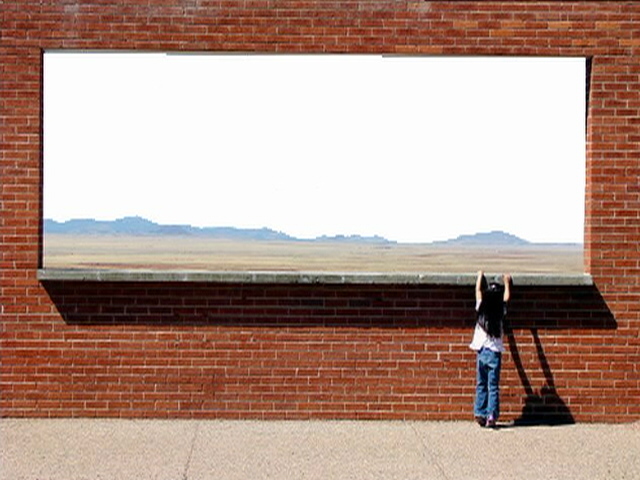 dsc00078.jpg
 dsc00079.jpg
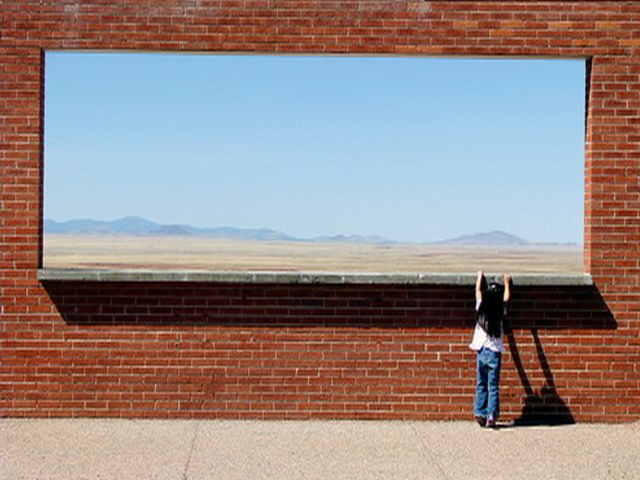 dsc00080.jpg
 dsc00081.jpg
 dsc00082.jpg
 dsc00083.jpg
 dsc00084.jpg
 dsc00085.jpg
 dsc00086.jpg
 dsc00087.jpg
 dsc00088.jpg
 dsc00089.jpg
 dsc00090.jpg
 dsc00091.jpg
 dsc00092.jpg
 dsc00093.jpg
 dsc00094.jpg
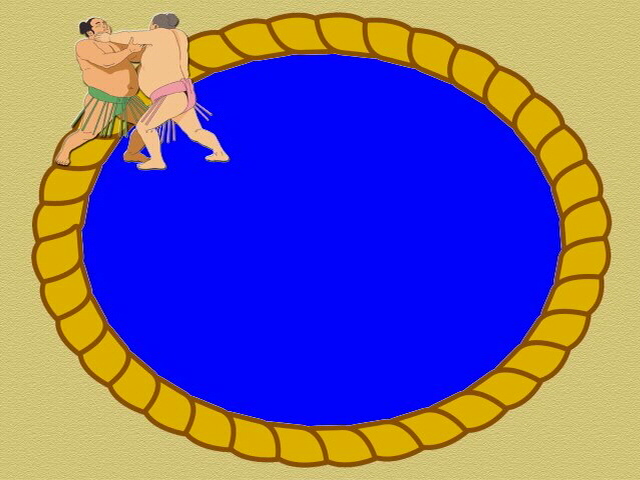 dsc00095.jpg
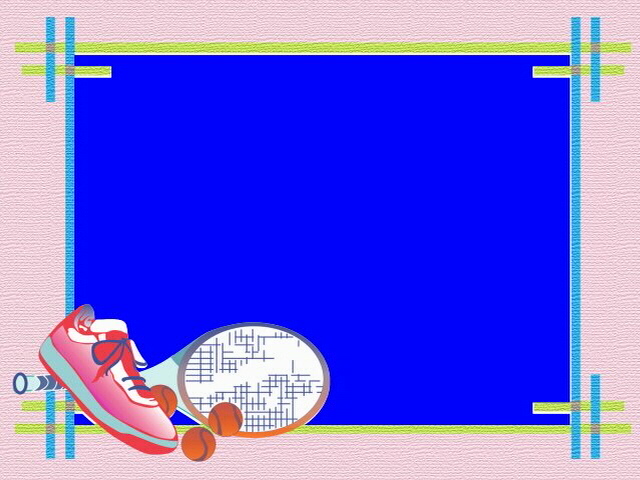 dsc00096.jpg
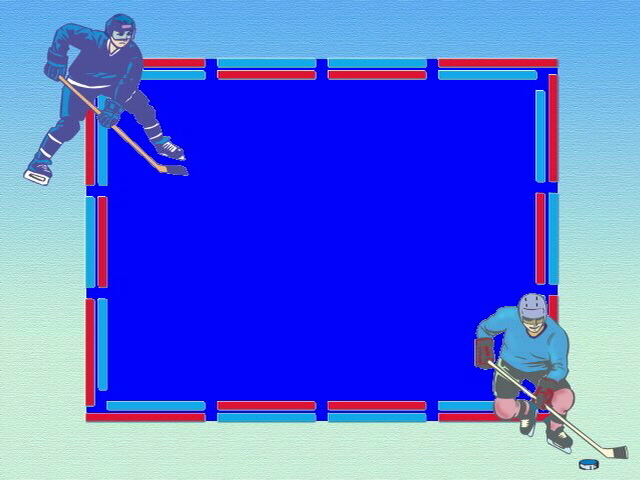 dsc00097.jpg
 dsc00098.jpg
 dsc00099.jpg
 dsc00100.jpg
 dsc00101.jpg
 dsc00102.jpg
 dsc00103.jpg
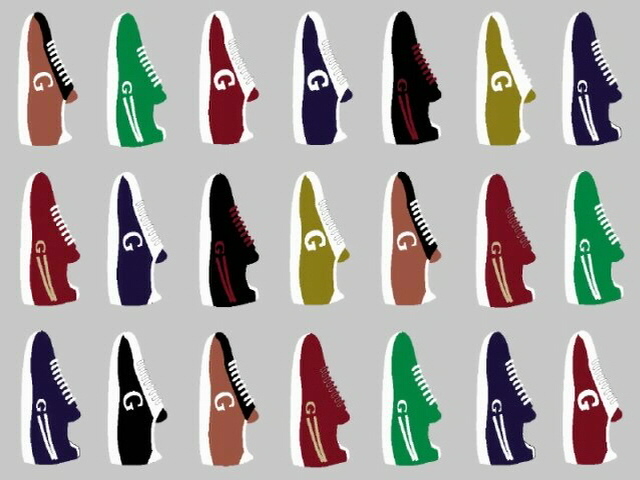 dsc00104.jpg
 dsc00105.jpg
 dsc00106.jpg
 dsc00107.jpg
 dsc00108.jpg
 dsc00109.jpg
 dsc00110.jpg
 dsc00111.jpg
 dsc00112.jpg
 dsc00113.jpg
 dsc00114.jpg
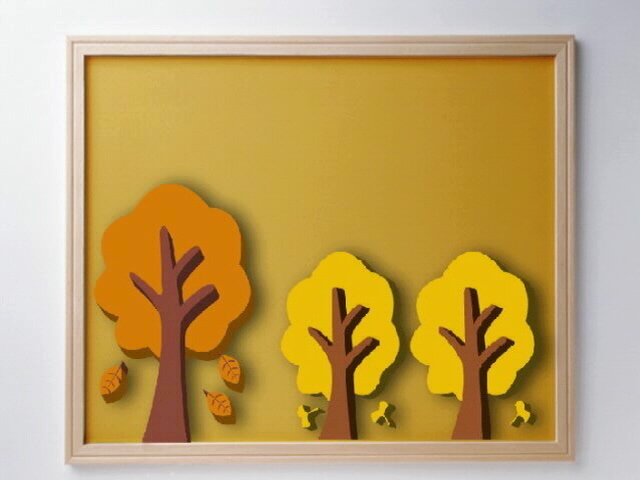 dsc00115.jpg
 dsc00116.jpg
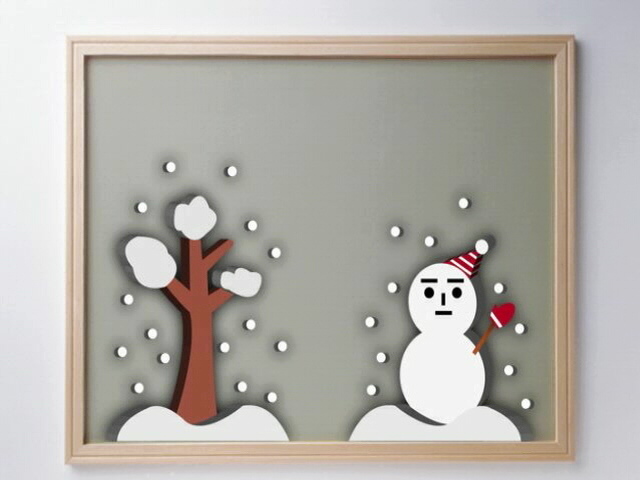 dsc00117.jpg
 dsc00121.jpg
 dsc00122.jpg
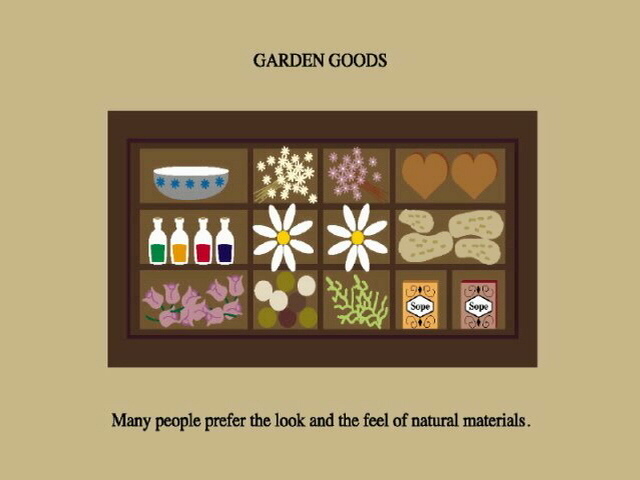 dsc00123.jpg
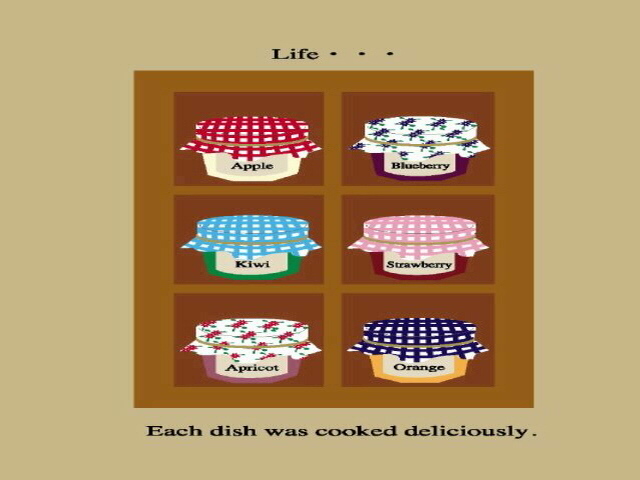 dsc00124.jpg
 dsc00125.jpg
 dsc00126.jpg
 dsc00127.jpg
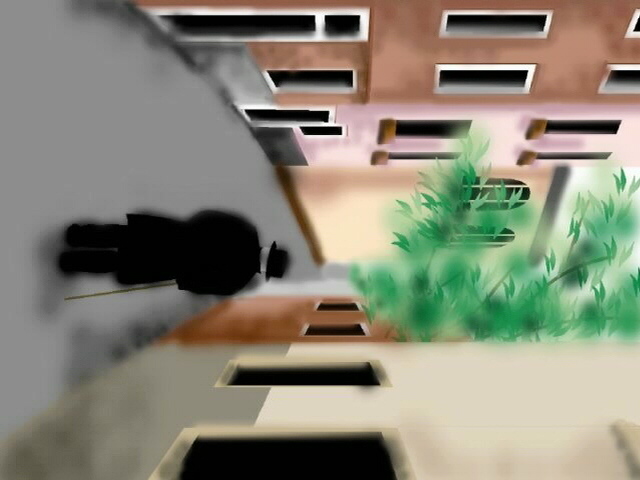 dsc00128.jpg
 dsc00129.jpg
 dsc00130.jpg
 dsc00131.jpg
 dsc00132.jpg
 dsc00133.jpg
 dsc00134.jpg
 dsc00135.jpg
 dsc00136.jpg
 dsc00137.jpg
 dsc00138.jpg
 dsc00139.jpg
 dsc00140.jpg
 dsc00141.jpg
 kitchenTileBlue.gif,
 kitchenTileRed.gif &
 kitchenTileYellow.gif.
 dsc00143.jpg
 dsc00144.jpg
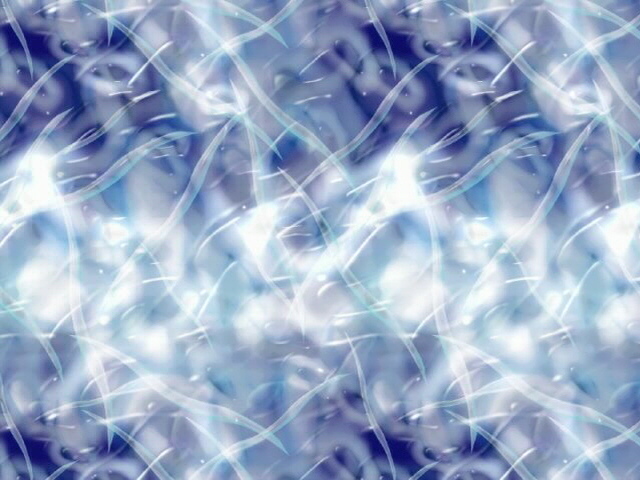 dsc00145.jpg
 dsc00146.jpg
 dsc00147.jpg
 dsc00148.jpg
 dsc00149.jpg
 dsc00150.jpg
 dsc00151.jpg
 dsc00152.jpg
 dsc00153.jpg
 dsc00154.jpg
 dsc00155.jpg
 dsc00156.jpg
 dsc00160.jpg
 dsc00161.jpg
 dsc00162.jpg
 dsc00163.jpg
 dsc00164.jpg
 dsc00165.jpg
 dsc00166.jpg
 dsc00167.jpg
 dsc00168.jpg
 dsc00169.jpg
 dsc00170.jpg
 dsc00171.jpg
 dsc00172.jpg
 dsc00173.jpg
 dsc00177.jpg
 dsc00178.jpg
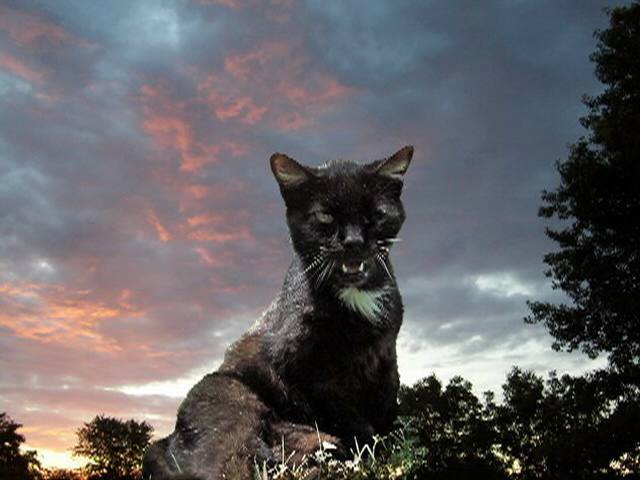 dsc00179.jpg
 dsc00180.jpg
 dsc00181.jpg
 dsc00182.jpg
 dsc00183.jpg
 dsc00184.jpg
 dsc00185.jpg
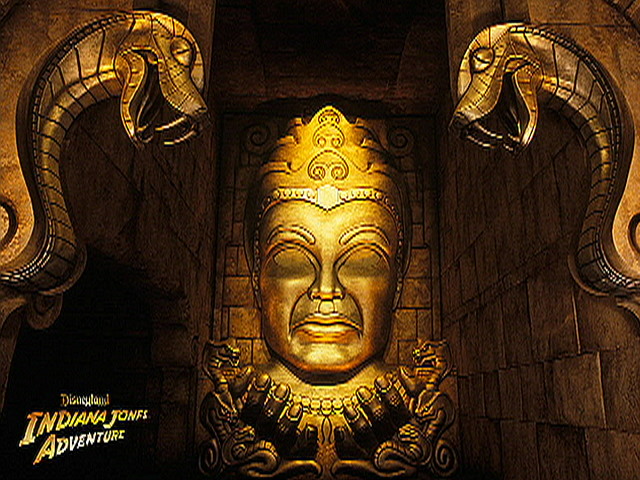 dsc00186.jpg
 dsc00187.jpg
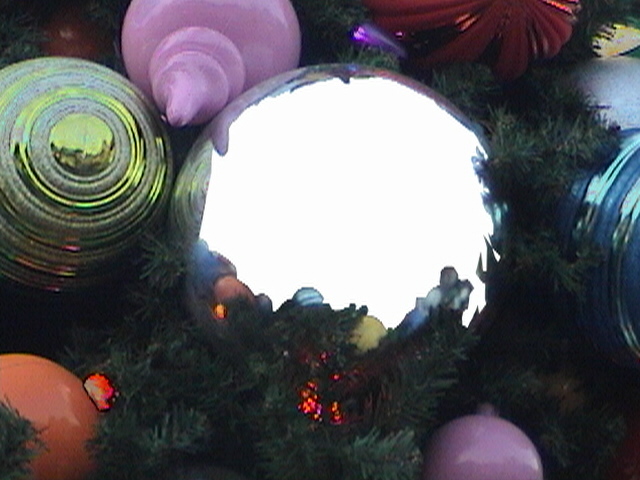 dsc00192.jpg
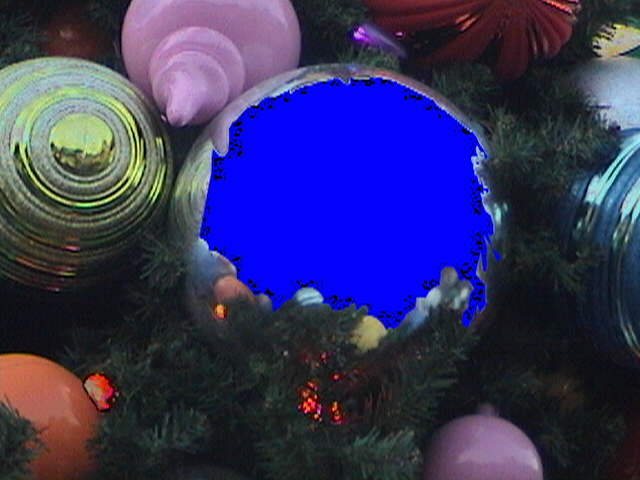 dsc00193.jpg
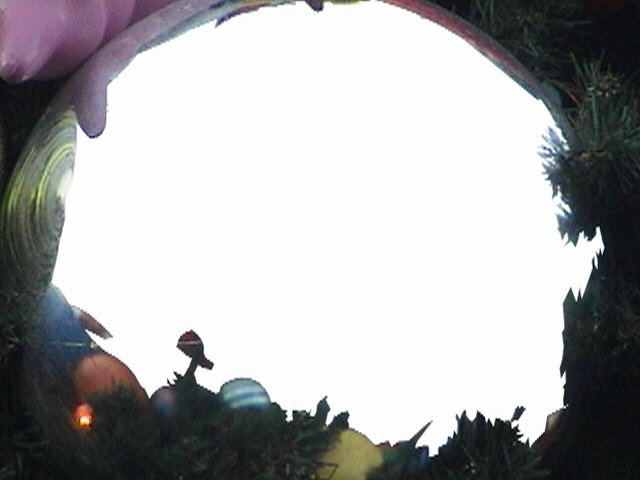 dsc00194.jpg
 dsc00195.jpg
 dsc00196.jpg
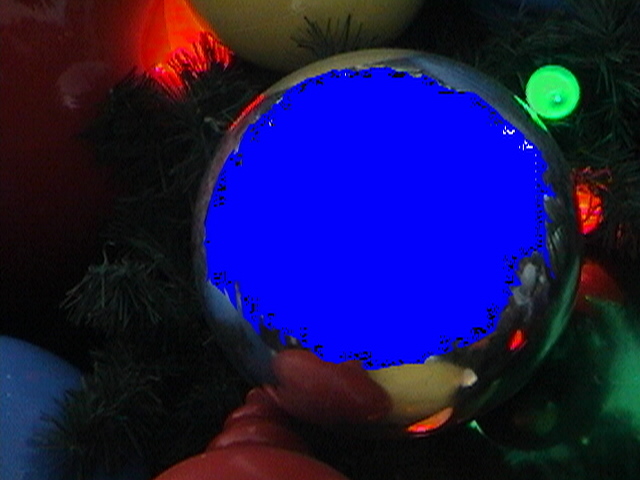 dsc00197.jpg
 dsc00198.jpg
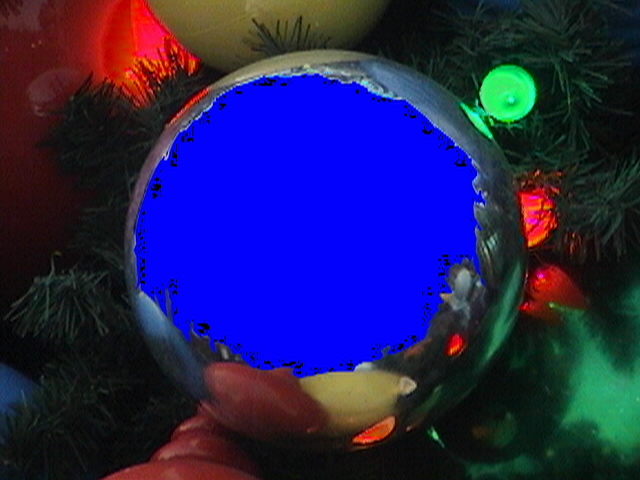 dsc00199.jpg
 dsc00204.jpg
 dsc00205.jpg
 dsc00206.jpg
 dsc00207.jpg
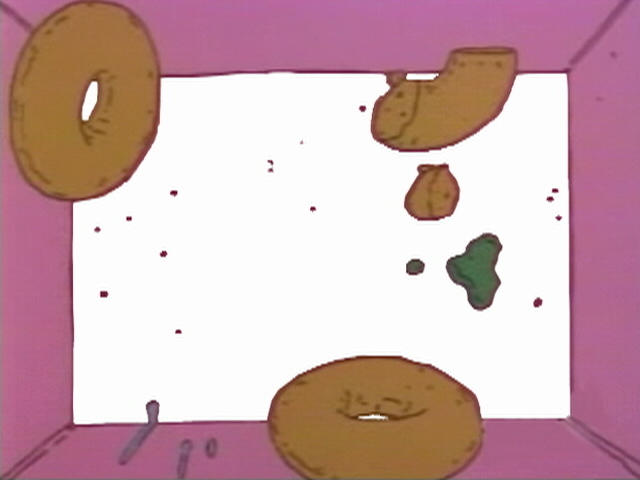 dsc00208.jpg
 dsc00209.jpg
 dsc00210.jpg
 dsc00211.jpg
 dsc00212.jpg
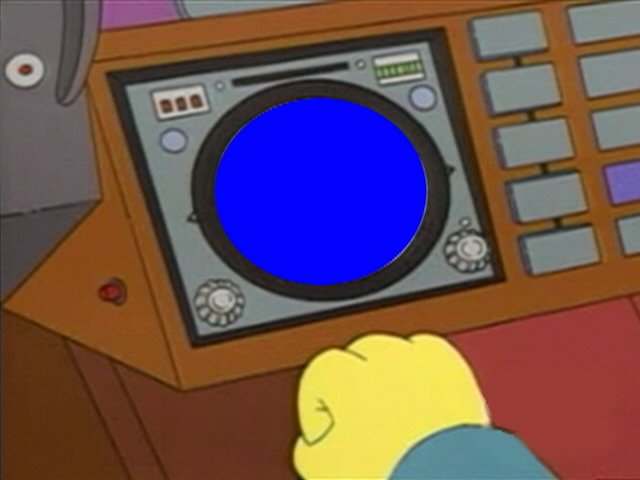 dsc00213.jpg
 dsc00214.jpg
 dsc00215.jpg
 dsc00216.jpg
 dsc00217.jpg
 dsc00218.jpg
 dsc00219.jpg
 dsc00992.jpg
 dsc00993.jpg
 dsc00994.jpg
 dsc00995.jpg
 dsc00996.jpg
 dsc00997.jpg
 dsc00998.jpg
 dsc09998.jpg
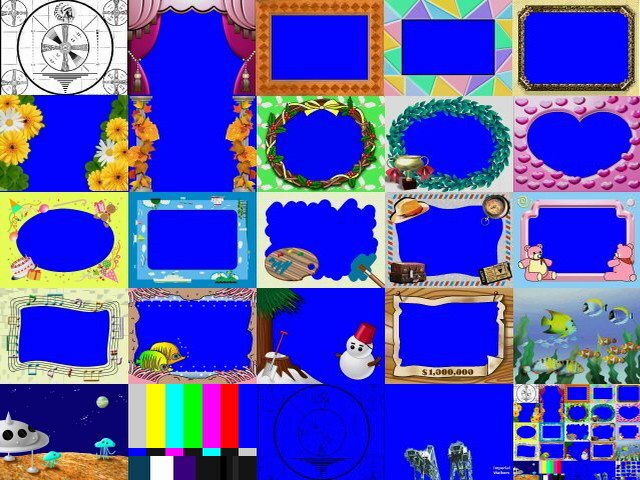 dsc09999.jpg


 Additionally some image elements may bleed through. With this stereo pair.
I had to mute highlights on the ornaments and the lights to keep them from the selection of transparency. And I had to do it evenly to both images to avoid visual discrepancy.
Additionally some image elements may bleed through. With this stereo pair.
I had to mute highlights on the ornaments and the lights to keep them from the selection of transparency. And I had to do it evenly to both images to avoid visual discrepancy.
 Framing Error


 TRV350